The first thing that I did after I bought a laptop with NVIDIA GPU was to install TensorFlow. I skimmed through many blogs and pages on how to install and I found a page by Christian Janze. He did a great job of putting everything together in one place. I'm creating this page on similar lines but added my own touch and experiences while installing TensorFlow.
Level 0
All the Prerequisites required before starting the installation.
- Install GNU Compiler Collection (GCC)
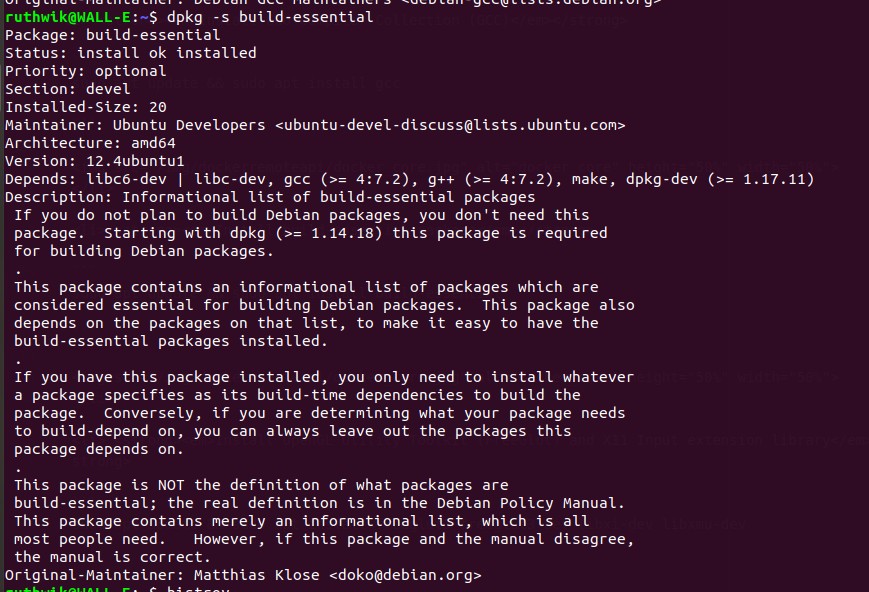
- Install build-essential package
- Install OpenGL Utility Toolkit (FreeGlut) and X11 Input extension library
sudo apt update && sudo apt install gcc 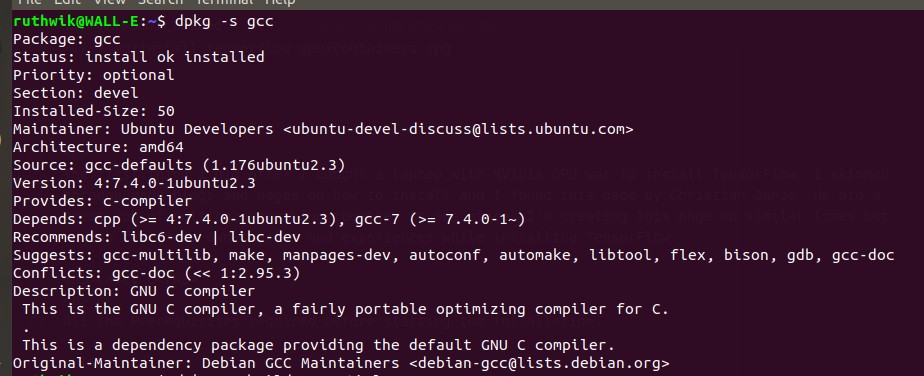
sudo apt update && sudo apt install build-essential
sudo apt update && sudo apt install freeglut3 freeglut3-dev libxi-dev libxmu-dev
Level 1 : Installing NVIDIA’s Linux Display Driver
The driver can be either downloaded from here. I used the following commands to install as it easy and simple.
sudo apt update
sudo ubuntu-drivers autoinstall
If everything goes well after firing these commands, then reboot your machine. The status of Nvidia GPU can be checked with the nvidia-smi.

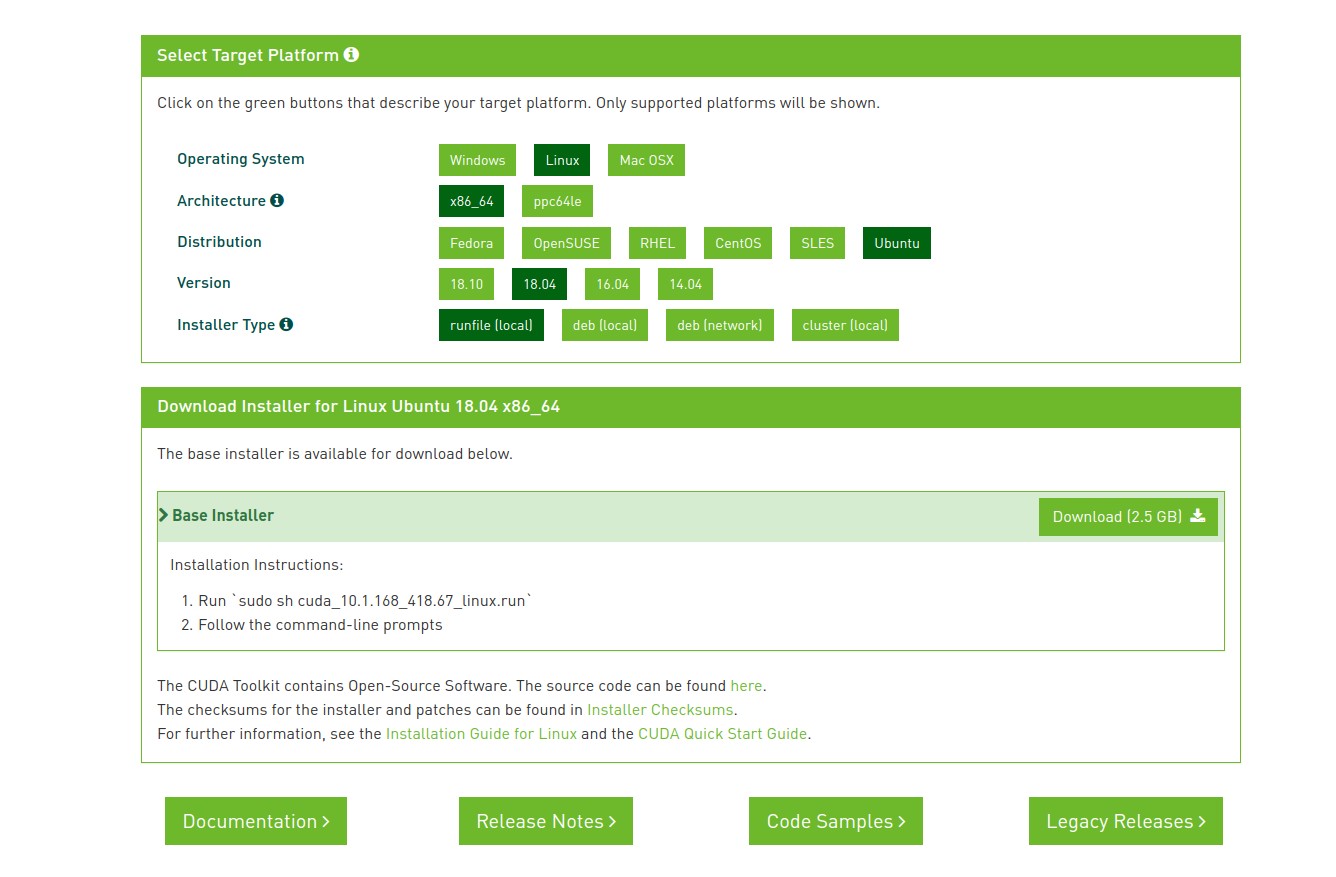
Level 2: Installing CUDA Toolkit 10 via Runfile
> CUDA is a parallel computing platform and application programming interface (API) model created by Nvidia. The NVIDIA® CUDA® Toolkit provides a development environment for creating high-performance GPU-accelerated applications. With the CUDA Toolkit, you can develop, optimize and deploy your applications on GPU-accelerated embedded systems, desktop workstations, enterprise data centers, cloud-based platforms and HPC supercomputers. The toolkit includes GPU-accelerated libraries, debugging and optimization tools, a C/C++ compiler and a runtime library to deploy your application.I installed using runfile as I need to set the PATH after installation. I need to install it at the path of my choice. I faced few problems here as I need to disable nividia driver before installing cuda. But I articulated all the steps here so that there won't be any problems.
1. Download the NVIDIA® CUDA® Toolkit from here.
2. Switch to tty3 by pressing Ctl+Alt+F3
3. Unload nvidia-drm before proceeding
- Isolate multi-user.target
- Check for nvidia-drm in use
- Unload nvidia-drm
- Note that nvidia-drm is not in use anymore
- Go to your download folder and run the cuda installation.
- Start the GUI again.
sudo systemctl isolate multi-user.target
lsmod | grep nvidia.drm
sudo modprobe -r nvidia-drm
lsmod | grep nvidia.drm
sudo sh cuda_10.1.168_418.67_linux.run
sudo systemctl start graphical.target
Setup the environment variables
Add the path in .bashrc file:
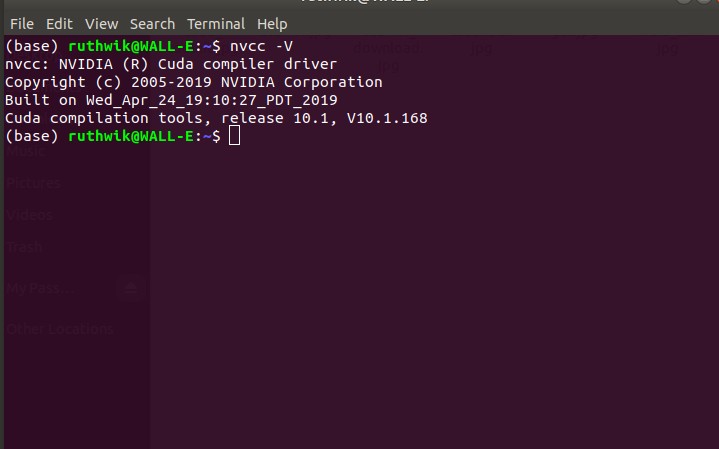
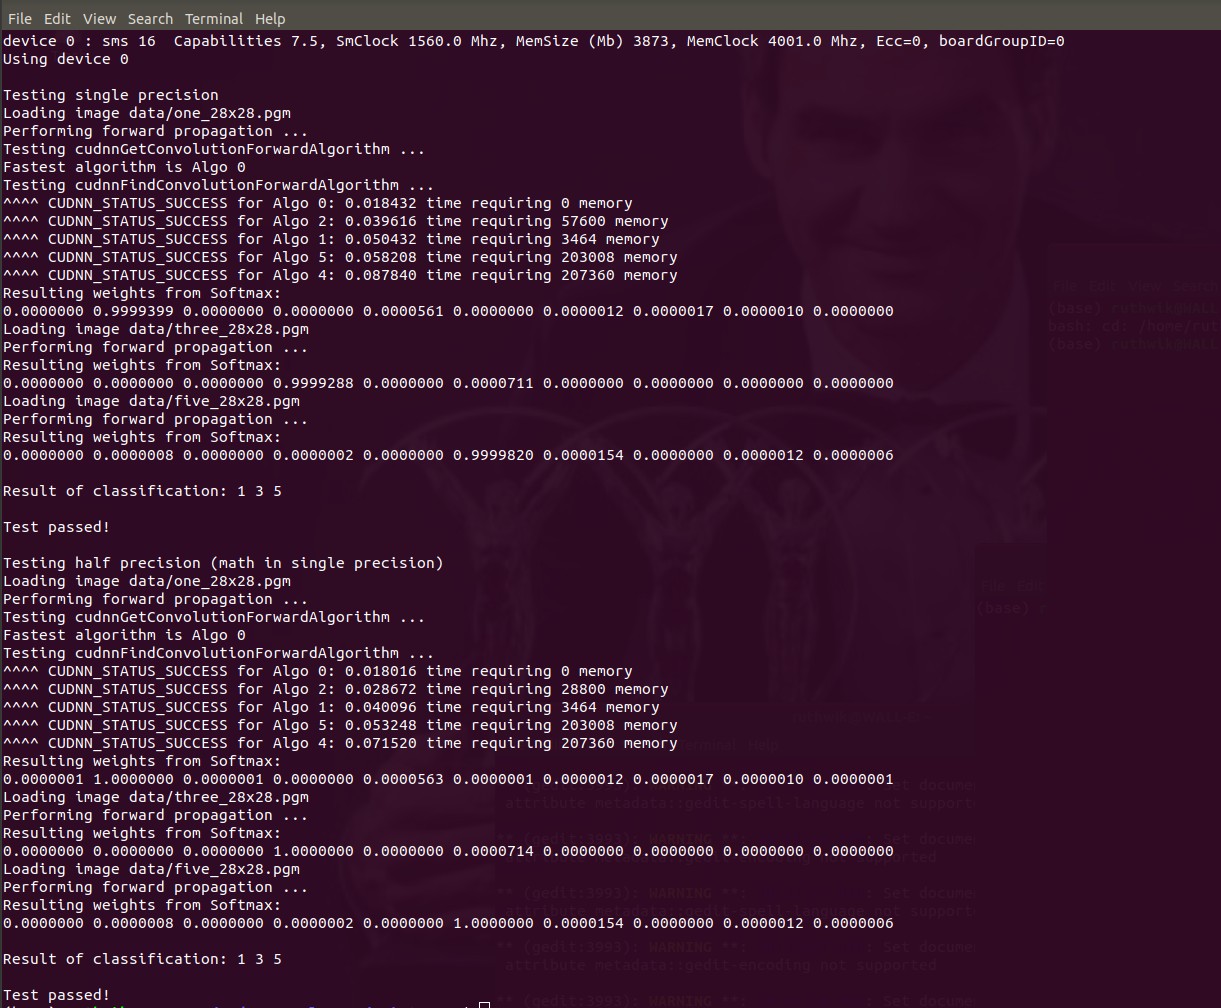
Verify the installation of NVIDIA’s CUDA Toolkit 10 compiler driver
nvcc -V
Level 3: Installing cuDNN
Please head over to the NVIDIA cuDNN website and click on the green Download cuDNN button. Unfortunately, you have to register for the NVIDIA Developer Program. Once you are registered, go to the NVIDIA cuDNN website and fill in the survey to reach the download page.
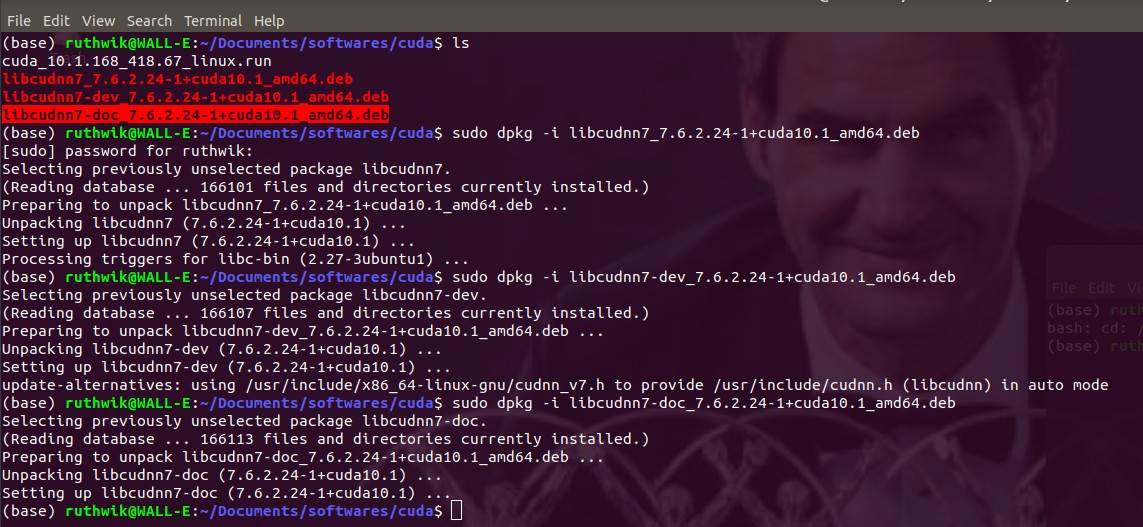
sudo dpkg -i libcudnn7_7.6.2.24-1+cuda10.1_amd64.deb
sudo dpkg -i libcudnn7-dev_7.6.2.24-1+cuda10.1_amd64.deb
sudo dpkg -i libcudnn7-doc_7.6.2.24-1+cuda10.1_amd64.deb=
Verify the installation of NVIDIA’s CUDA Toolkit 10 compiler driver
Installing TensorFlow 1.14
This can be done in two ways one by using pip and another by using conda if you want to use anaconda.
Using PIP
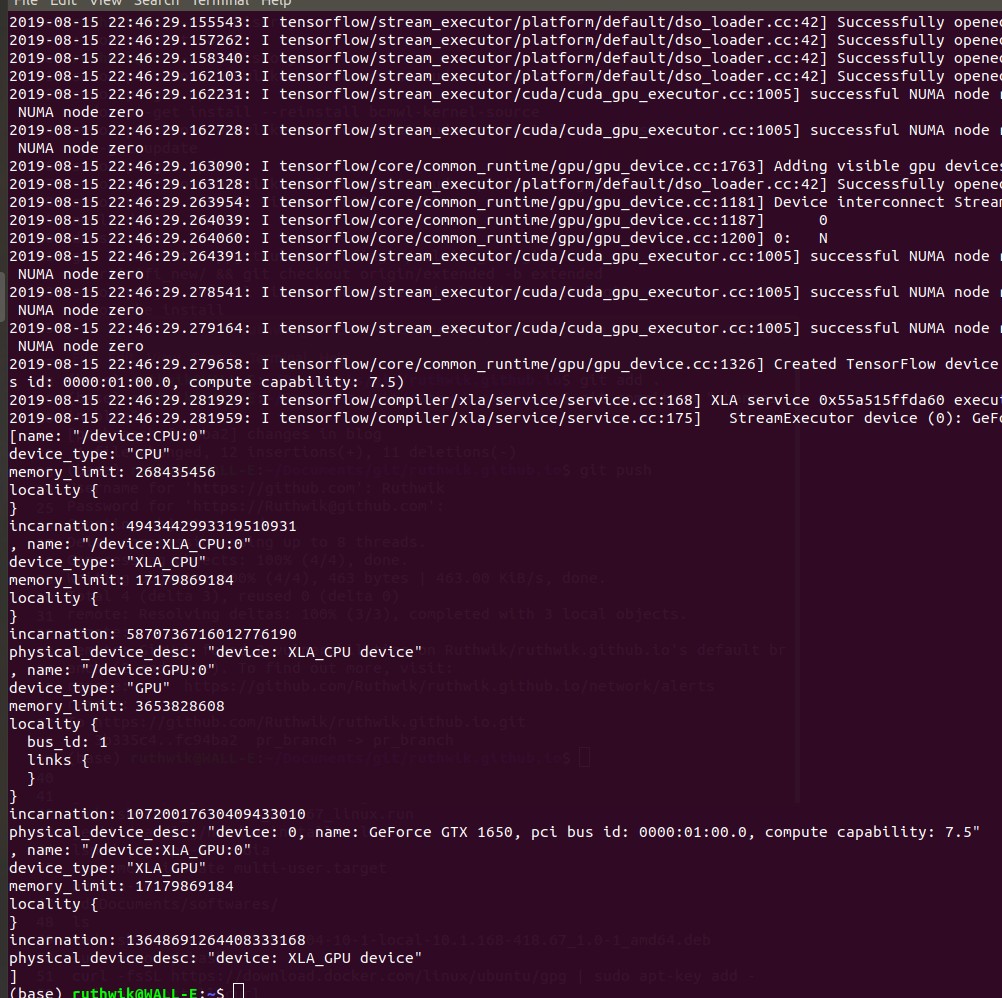
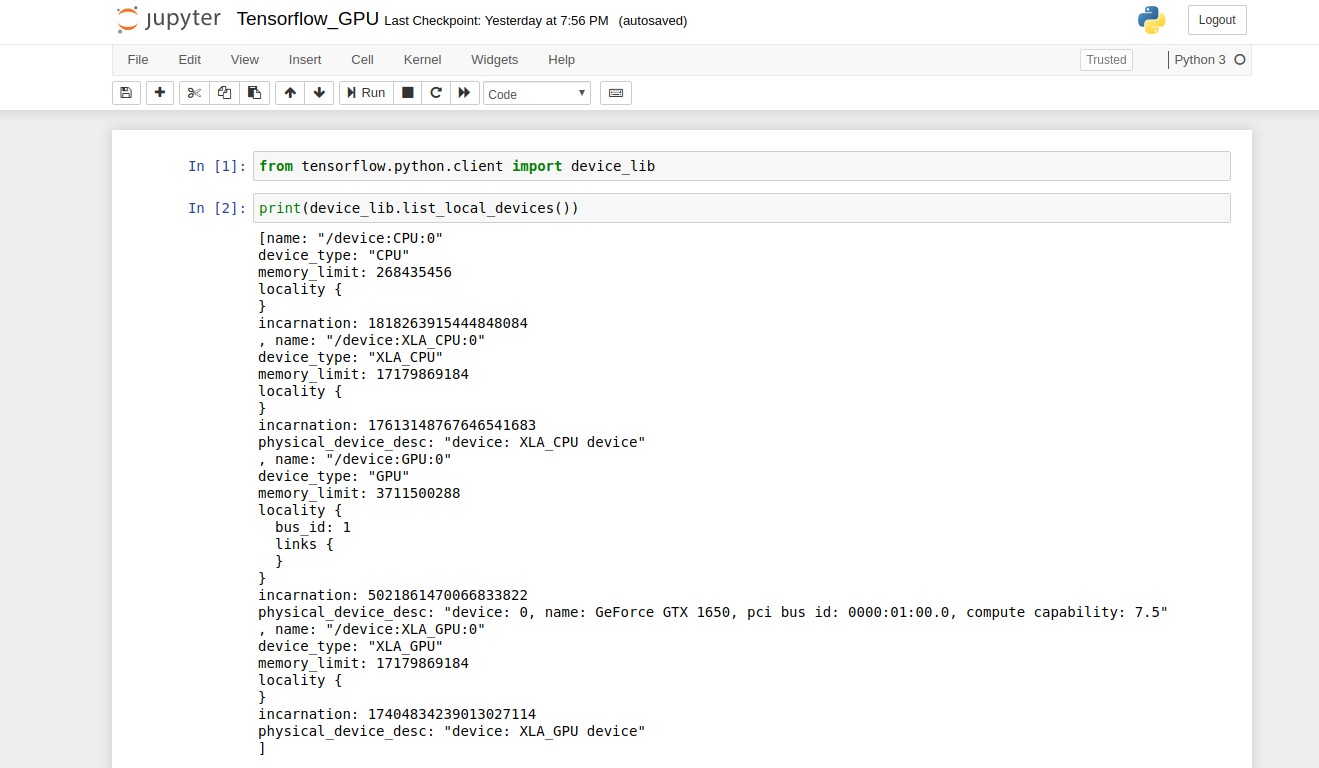
Verify TensorFlow installation
python -c "from tensorflow.python.client import device_lib; print(device_lib.list_local_devices())"
Using Conda
If you have any question or feedback, please do reach out to me by commenting below.